If you are using Azure Verified Modules, either the Bicep or Terraform modules, you have likely encountered scenarios where you wished for additional features. This blog is a practical guide to help you make your first contribution to Azure Verified Modules, enabling you to turn those additional features into reality. This blog will focus on the Bicep side of AVM, but can also be used when contributing to the Terraform AVM modules!
What are Azure Verified Modules?
Azure Verified Modules (AVM) is a Microsoft initiative aimed at establishing a benchmark for Infrastructure as Code (IaC) standards mainly for Azure Bicep and Terraform. The modules in this repository adhere to these IaC standards and are maintained by Microsoft’s product groups, while also benefiting from community contributions.
Contributing to AVM
The reason to contribute to Azure Verified Modules typically involves one of the following:
- Implementing a solution for an identified issue.
- Fixing a bug in a template.
- Adding an improvement to the existing modules.
The AVM team has made contributions very easy. When making a contribution, you only need to write Bicep code because everything else is automated (tests, generation of documentation, etc.). For contributing to Bicep modules, the repository used will be bicep-modules-registry: https://github.com/Azure/bicep-registry-modules.
Prerequisites
Before we go to the contributing part there are some things to take into account:
- A GitHub account is required to contribute to AVM.
- Have git, Bicep CLI, and the Bicep VSCode extension installed.
- Be familiar with writing Bicep templates and using git.
- Review the contribution guidelines at CONTRIBUTING.md.
In the next blog post section, we will look at a GitHub Issue (https://github.com/Azure/bicep-registry-modules/issues/1436) reported by a community member. The issue has a request to improve the virtual machine module to support a custom osDisk and dataDisk name. Let’s start with the implementation!
Step-by-step contribution guide to AVM
There are five stages required to make a contribution to Azure Verified Modules:
- Fork and clone the bicep-registry-modules repository.
- Implement changes.
- Update the documentation.
- Run the tests.
- Submit the pull request.
Let’s start with step 1. by forking the bicep-registry-modules repository.
1. Fork and clone the bicep-registry-modules repository
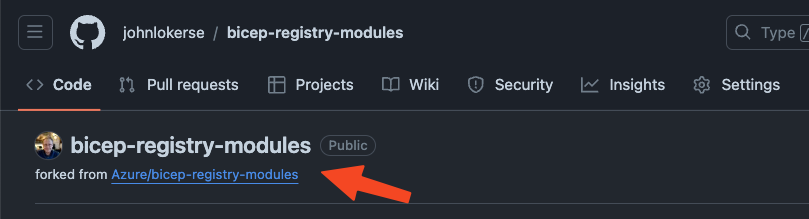
A fork is a copy of a repository. Forking a repository allows you to experiment with changes without affecting the original project. Once you have forked the repository, it will appear under your GitHub repositories. This repository can then be cloned locally to implement changes.
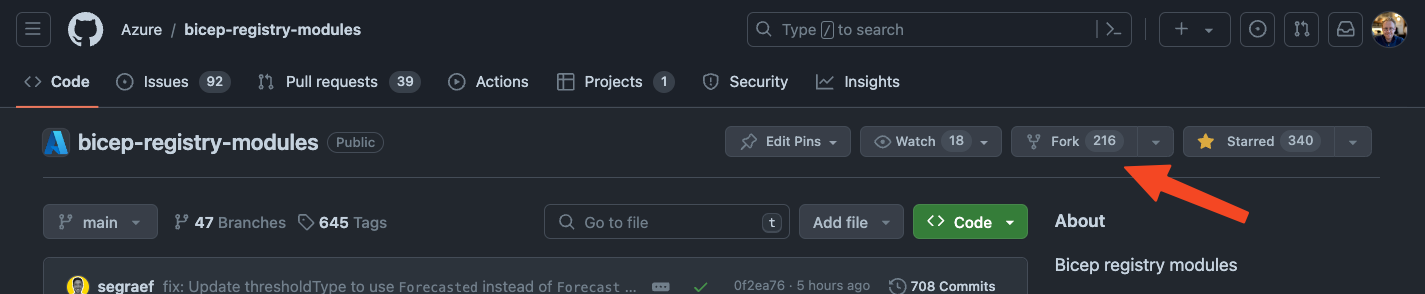
You can fork the repository by either visiting the GitHub repository and clicking on the Fork button or by going to the following URL: https://github.com/Azure/bicep-registry-modules/fork.
2. Implement changes
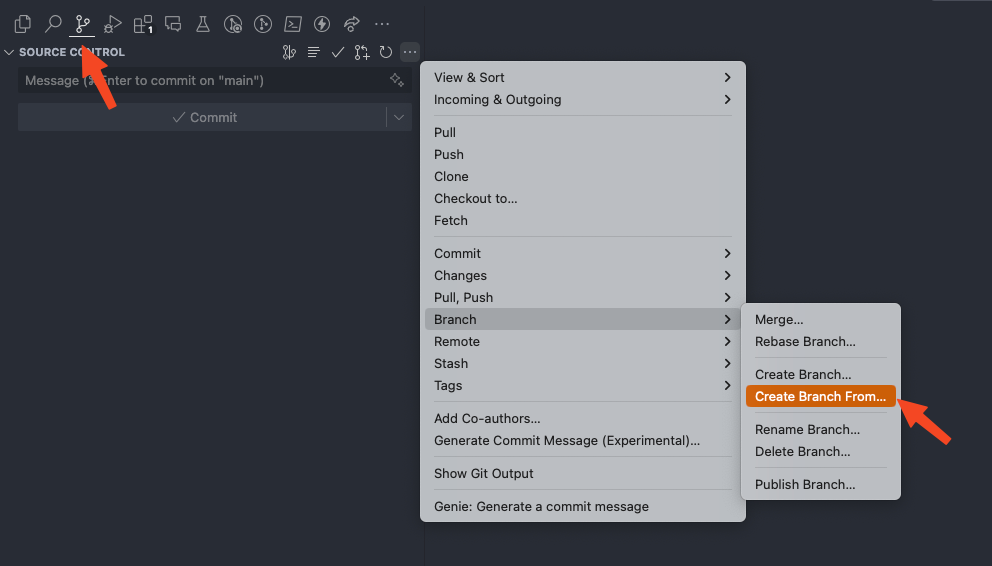
Now you have isolated the repository from the main repository by forking it, and you have cloned it locally on your computer. In your editor (in this blog, I use Visual Studio Code), open the source control panel, create a branch from main, and give your branch a name.
I normally create a branch with the name of my GitHub username followed by what I am contributing to. For example, in this case, it would be johnlokerse/issue1436.
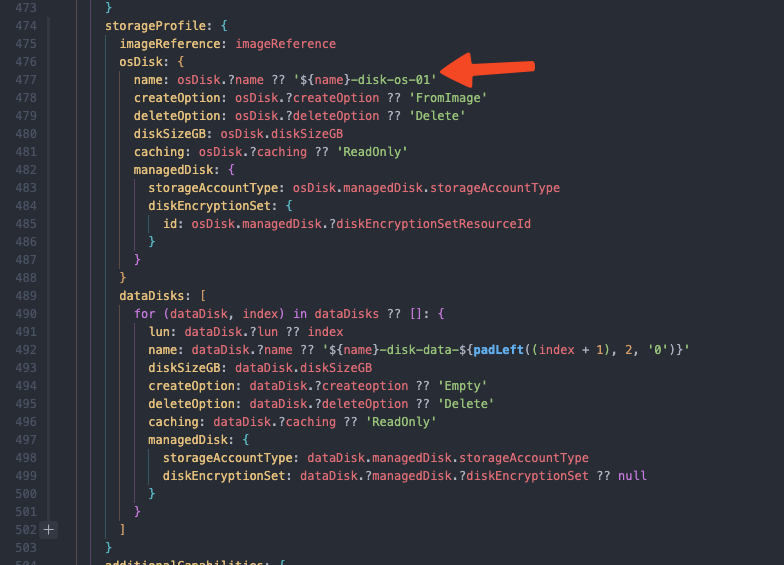
When an issue is logged it is required to specify which module has an issue. In this case, the module that has an issue is the avm/res/compute/virtual-machine module. The request is to add the ability to give osDisk and dataDisk a custom name.
In the snippet below you see the virtual machine main.bicep with two user-defined types. I added these types to give the complex object parameters osDisk and dataDisk a strongly typed value and constraints on what properties the object requires and what is optional.
Also, the name property is optional (due to string?), this is because the name is either custom by the user or a default name is used.
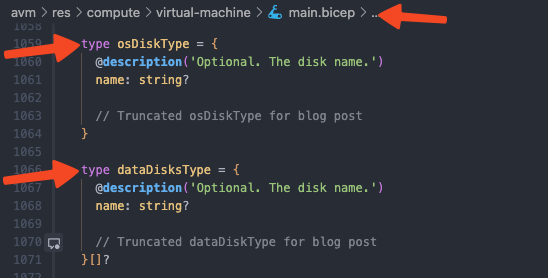
Also below, we added the reference to the user-defined types placed on the corresponding parameter. This parameter will now use the types osDiskType and dataDiskType.

In the image below, you see the implementation of the osDisk?.name property. This property is nullable, and not required, so we need to implement a fallback value if the property is null. To handle this, we implemented a coalesce check by using the ?? operator, which returns the first non-null value. So, when osDisk?.name is equal to null, it checks the next value. In this case, it will use the string interpolated value ${name}-disk-os-01.
Now that we have implemented the change we wanted, there is another important step. The next step is to update the test Bicep templates to correspond with the changes you have made. These test templates can be found in the test folder. These tests are important for a later stage of the contribution.
3. Update the documentation
After you have implemented the changes in the Bicep template files, it is important to update the documentation. The documentation is semi-automated and generated via a PowerShell script: Set-AVMModule.ps1. This script is located in the folder bicep-registry-modules/avm/utilities/tools/.
This script updates the existing README documentation based on the changes made, builds the main.bicep template file, and fails when there are errors. The script contains a PowerShell function that you must dot source by executing . bicep-registry-modules/avm/utilities/tools/Set-AVMModules.ps1.
After the function has been dot-sourced, it is loaded into the PowerShell environment and can be called with Set-AVMModules. Navigate to the folder where the changes are located, in this case, the folder virtual-machine, and run the command as seen below:
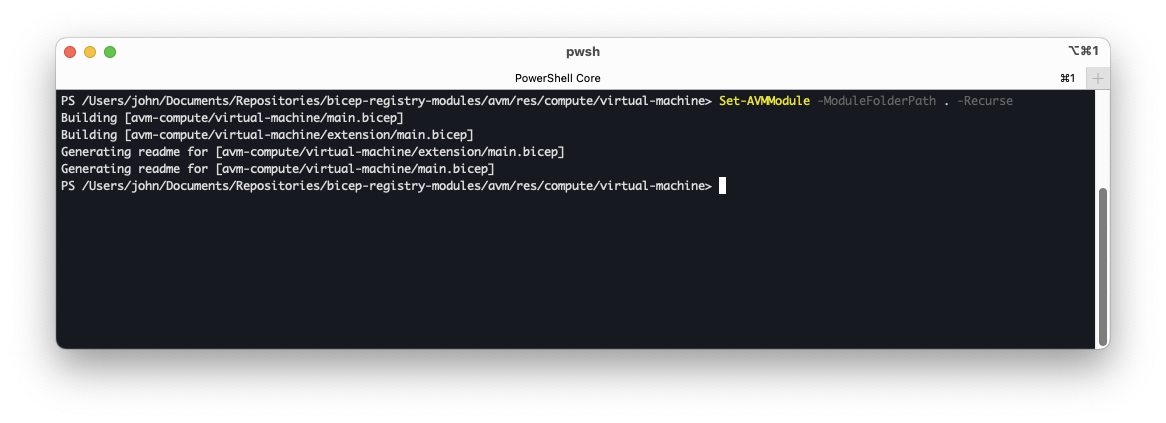
The outputs of the script are an updated README file and the Bicep template that has been built.
4. Running the tests
Running tests and having a successful GitHub Actions workflow is really important as it shows the maintainers that the changes you have implemented work.
This step requires an Azure environment where the Action can be deployed. If you don’t have an environment available, proceed to step 5 and ask for help in the pull request. If you have an environment available, two one-time configurations need to be made:
- A service principal must be created with
Contributorpermissions on the subscription where the tests will be deployed. - You will need to set up some GitHub Actions variables before running a test deployment:
- ARM_MGMTGROUP_ID: The GUID (Tenant Root Group) or the name of the management group.
- ARM_SUBSCRIPTION_ID: The GUID of the subscription where the tests will be deployed.
- ARM_TENANT_ID: The GUID of the tenant.
- AZURE_CREDENTIALS: Connection credentials. See the exact format in the snippet below.
The clientId and the clientSecret from the service principal must be included in the AZURE_CREDENTIALS variable for a successful connection to Azure:
{
	"clientId": "<client ID from the service principal>",
	"clientSecret": "<secret generated from the service principal>",
	"subscriptionId": "22222222-2222-2222-2222-222222222222",
	"tenantId": "33333333-3333-3333-3333-333333333333"
}
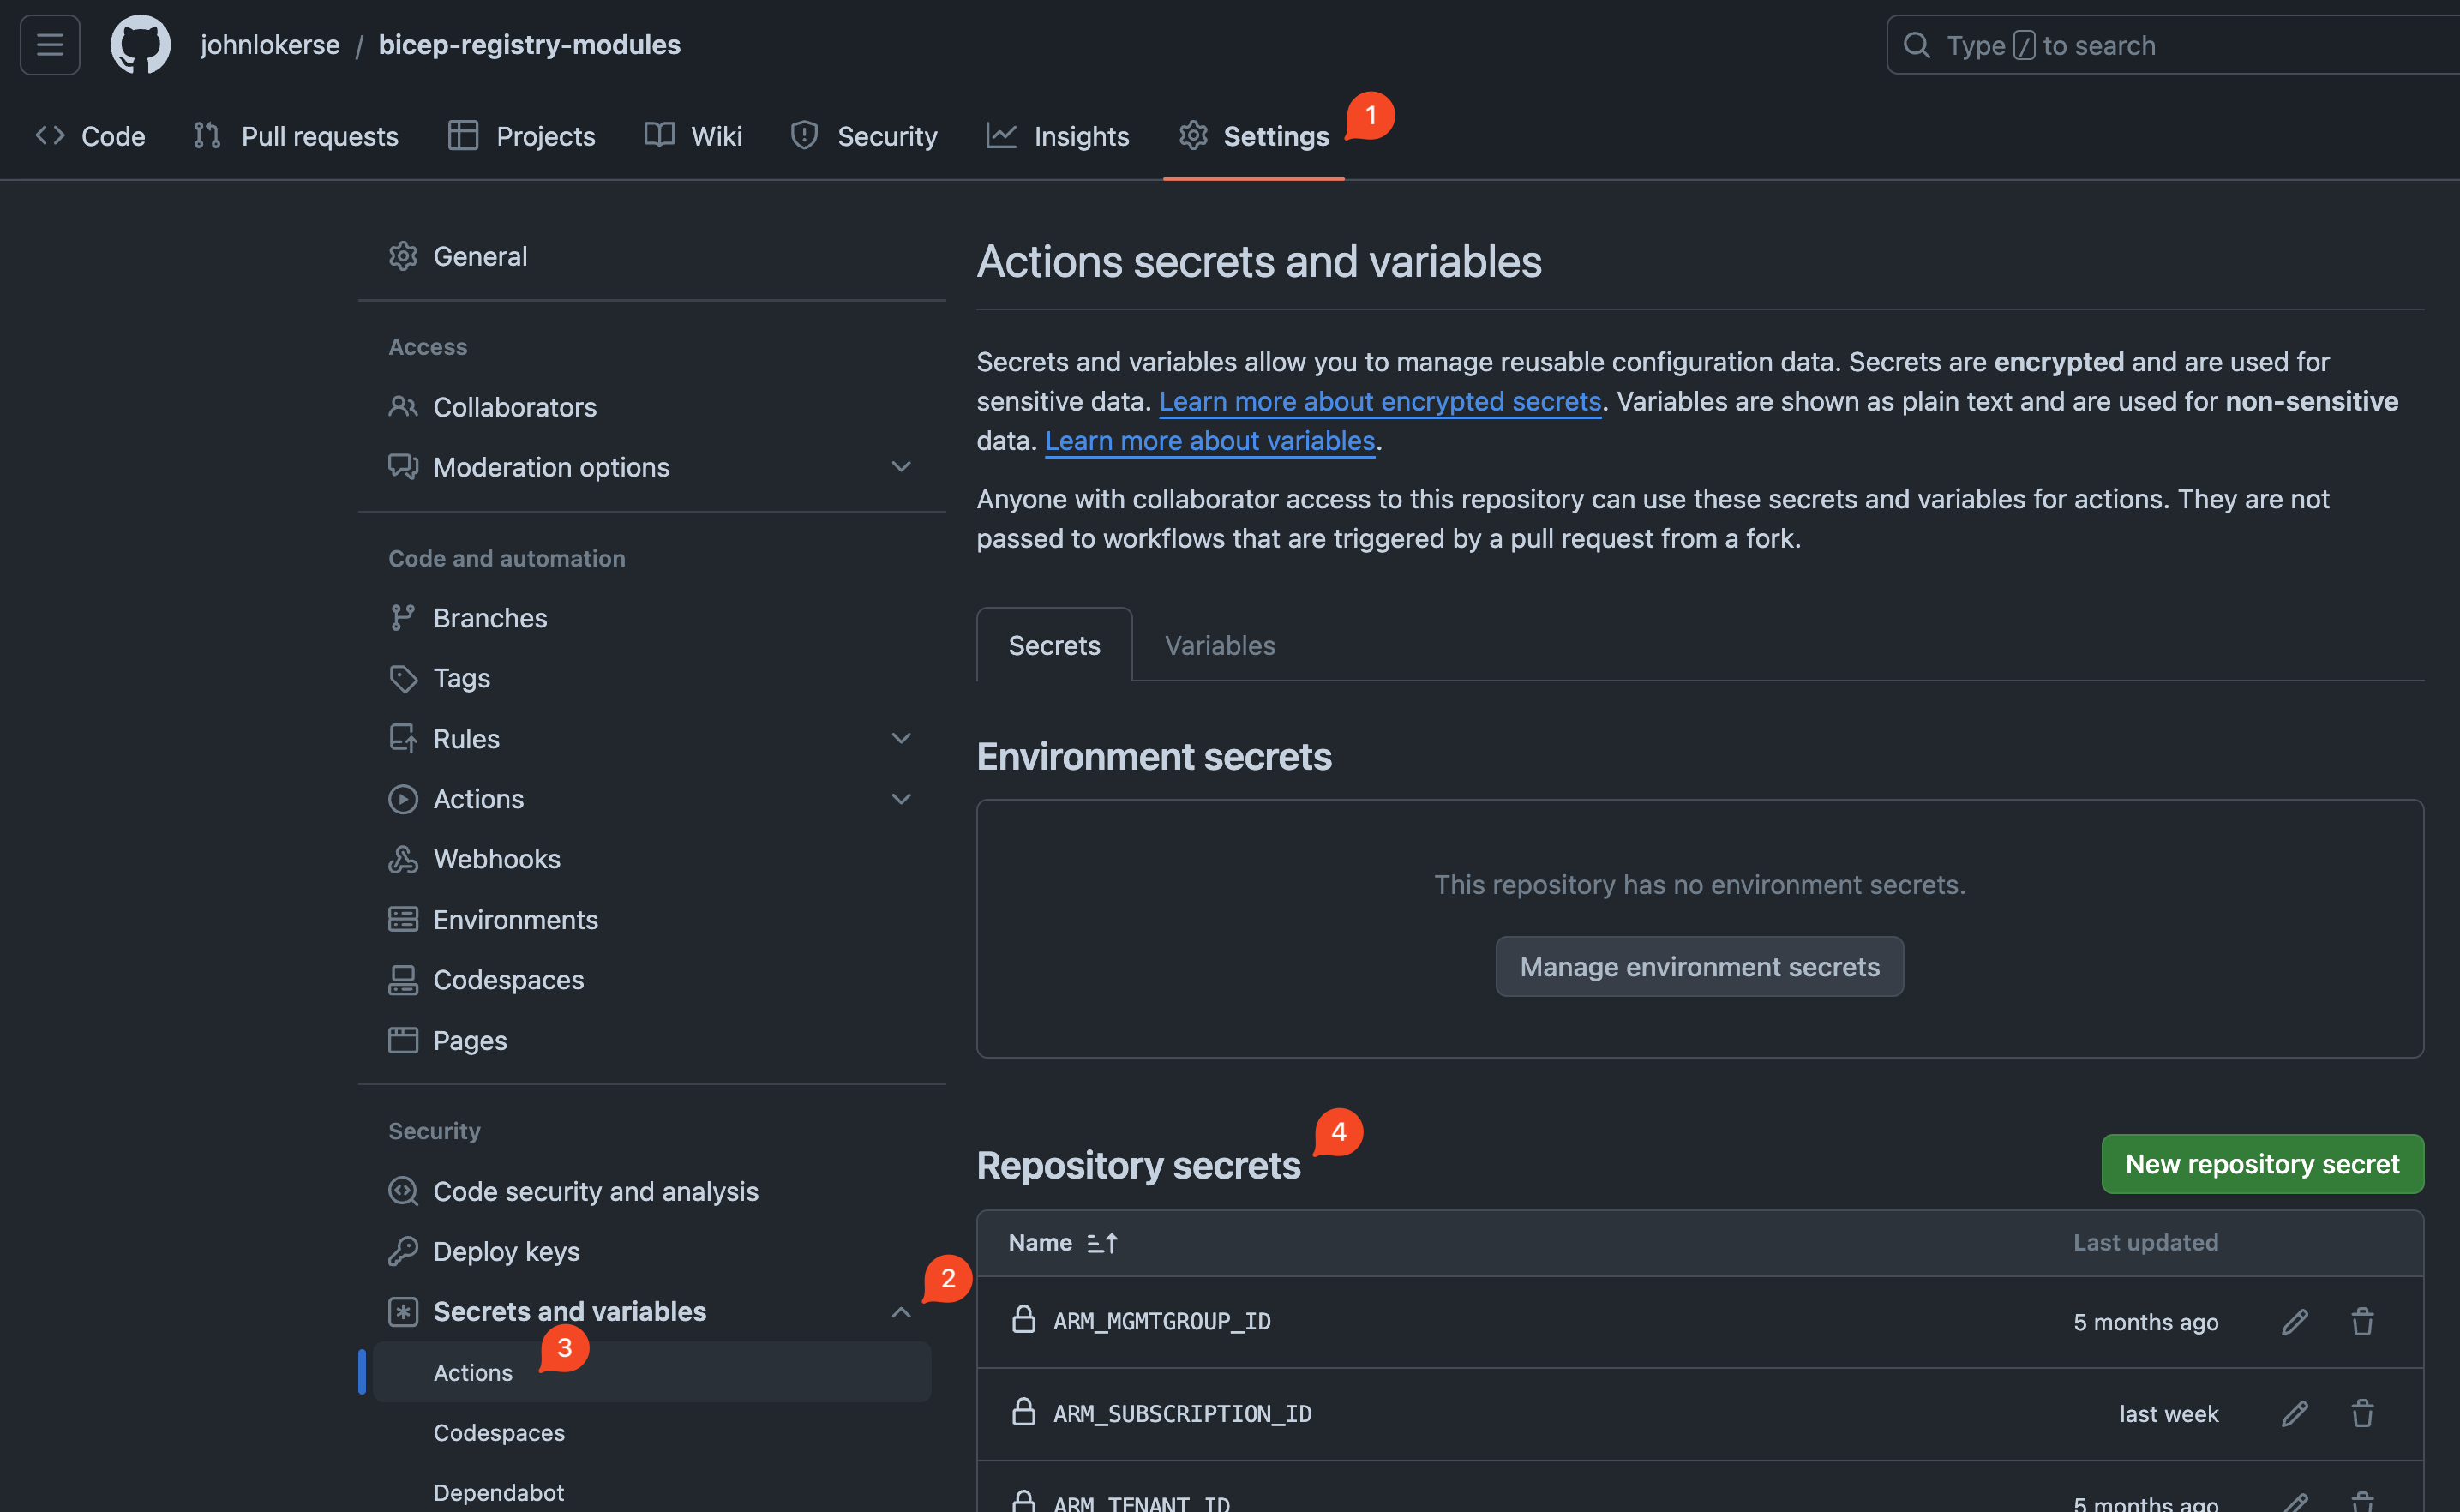
The GitHub Actions variables can be set in the repository’s settings. To do this, follow these steps:
- Navigate to the forked GitHub repository and go to Settings
- On the left sidebar, click on ‘Secrets and variables.’
- On the left sidebar, then go to Actions
- Add the repository secret by clicking on the green
New Repository Secretbutton. After saving the secret it will be available in the GitHub Action workflows.
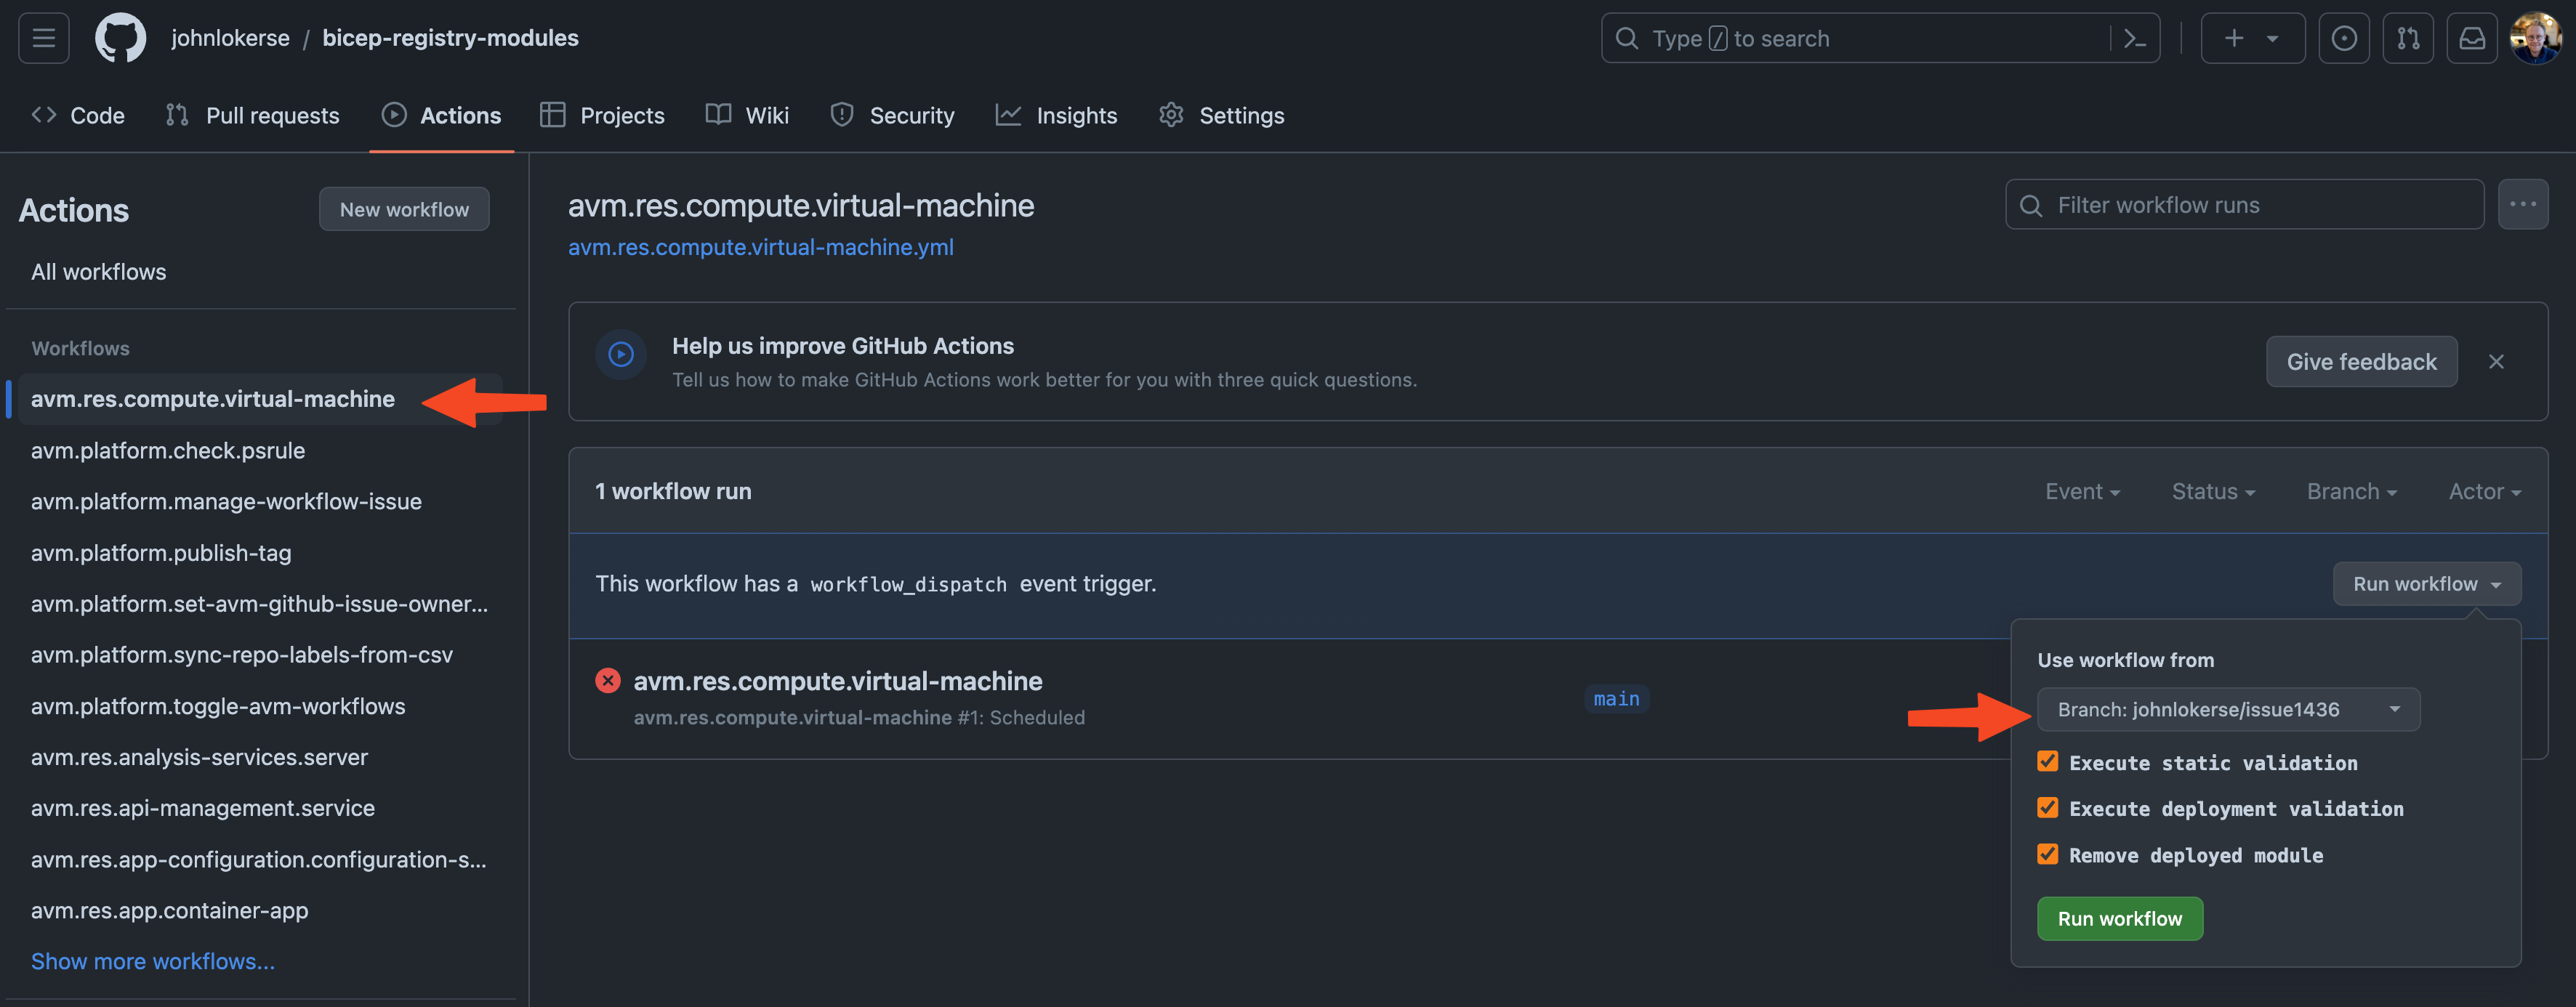
It is time to run the tests! As seen in the image below, under the Actions tab, you can see all the available workflows. Find the workflow that you need to run the tests for. To run the workflow, it is important to select the branch that you are working on. Also, as seen in the image below, it is possible to select specific jobs to run in the workflow:
- Execute static validation
This job runs Pester tests and checks whether the folders contain a README, if the description decorator is written following a standard, includes PSRule checks, and so on.
- Execute deployment validation
This job deploys the test Bicep templates.
- Remove deployed module
This job removes the deployed test resources from your Azure environment. I would highly recommend enabling this job; otherwise, the resources will remain in your environment, potentially costing you a lot of money.
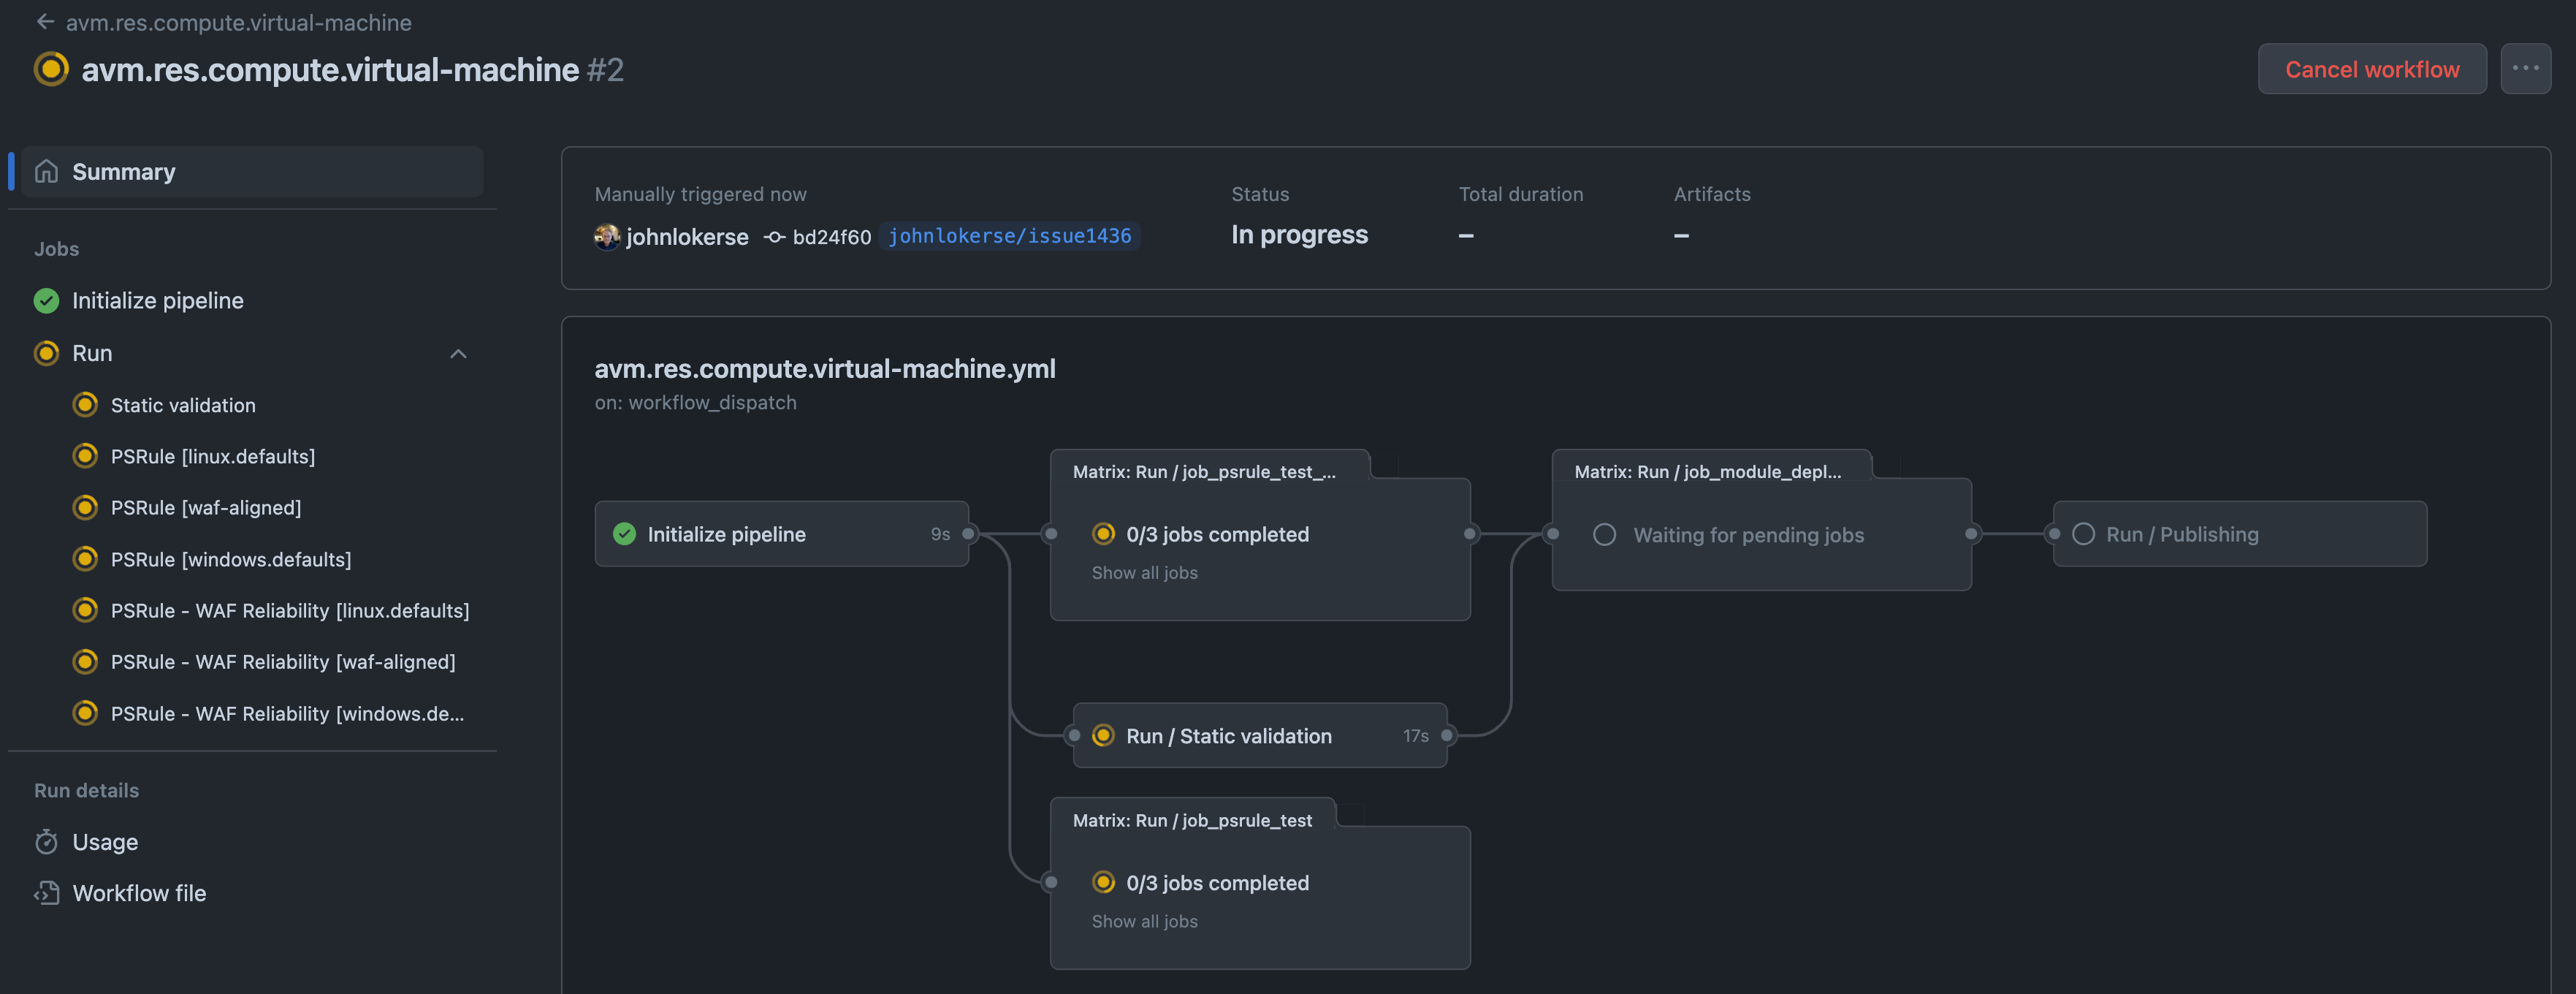
When all jobs are green and have been successfully executed, copy the workflow status badge. See the image below to locate the status badge. This badge is required in the last step.

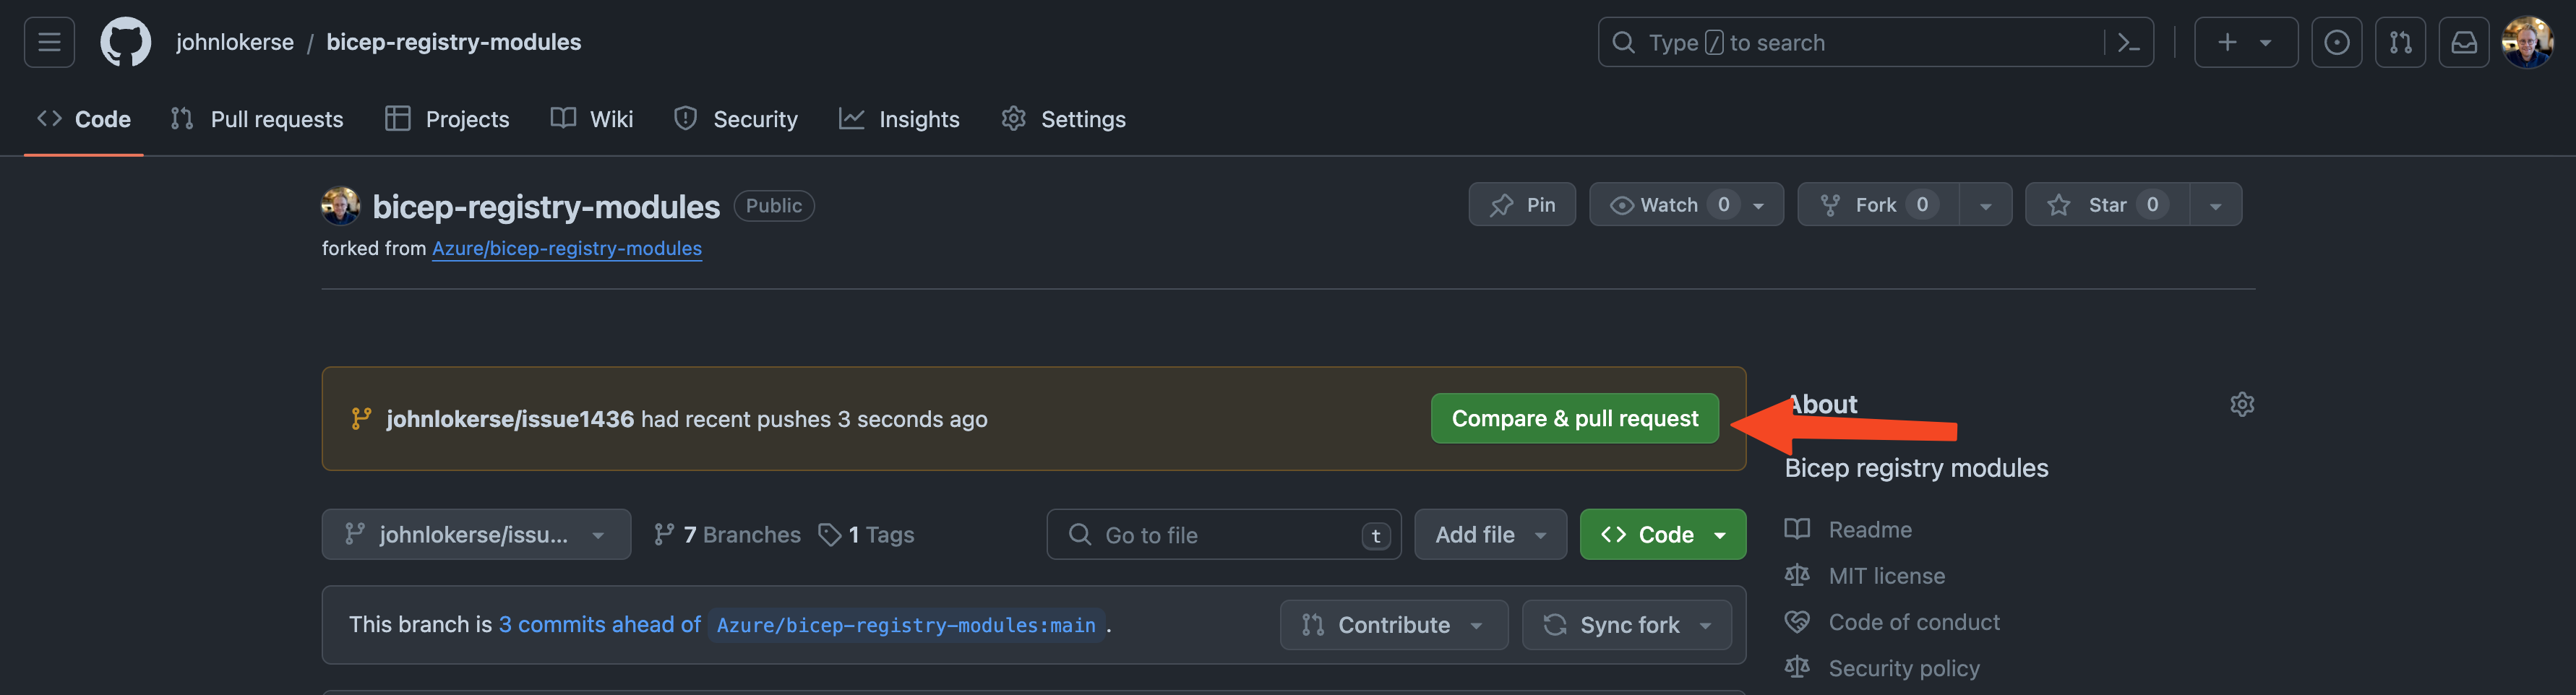
5. The pull request
The last step is to open a pull request to the main branch of the Azure/bicep-registry-modules repository. The easiest way to do this is by navigating to the forked repository and selecting your branch. As seen in the image below, a green Compare & pull request button will appear. Click on this button to open the pull request. Then, fill in the title and description.
Tips
I want to share some tips that I have learned while contributing to Azure Verified Modules:
- Don’t be afraid to ask for help or to ask questions. The maintainers are happy to help, and they see value in your contribution!
- Scope your contributions to small changes rather than large ones.
- Avoid unexpected costs by disabling GitHub workflows to prevent unintended deployments. When synchronising the main branch with your development branch, it can happen that changed modules are deployed to your environment. To enable or disable the workflows run the workflow
avm.platform.toggle-avm-workflows.yml.
Conclusion
This is how to contribute to AVM, whether to resolve an issue, fix a bug in a template, or make an improvement, as detailed in the step-by-step guide. The AVM team has made it easy for us, the community, to contribute to the Bicep or Terraform modules. The bicep-registry-modules repository is a fast-evolving and growing repository so steps in my practical guide can be subject to change, so this blog will be frequently updated.
There are many contribution workflows; this guide represents just one of those. If this is your first contribution, this workflow can be easy to pick up. Either way, contributing to Microsoft Open Source repositories is a win for Microsoft, the community and yourself!
External Links
Some links on the Azure Verified Modules topic:

Hey John,
this helped me alot for the first PR to the repo. Thanks!
Just want to mention, that some workflows need more environment variables. In my case (using `avm.res.web.site`) I needed to add the
TOKEN_NAMEPREFIXwith a lowercase short value. Was used within Resource Group Names and Storage Accounts (therefore lowercase)Hope it helps the next one when he tries to run the workflows.
Cheers,
Christoph.
LikeLiked by 1 person
Awesome Christoph! Thank you for the addition 😁💪🏻
LikeLike